Setting up Amazon QuickSight
Querying our data directly is nice but can be cumbersome, plus in many cases it is easier to get insights once you can visualise your data. QuickSight provides an easy to explore data sets and use a visualisation layer that can directly interact with Athena (and many other data sources) and helps to provide insights quickly.
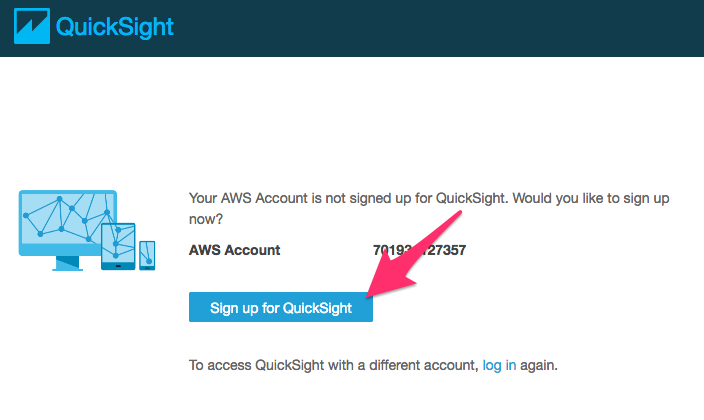
1) In order to use QuickSight for visualisation you need to first subscribe to Amazon QuickSight. Open the QuickSight console:
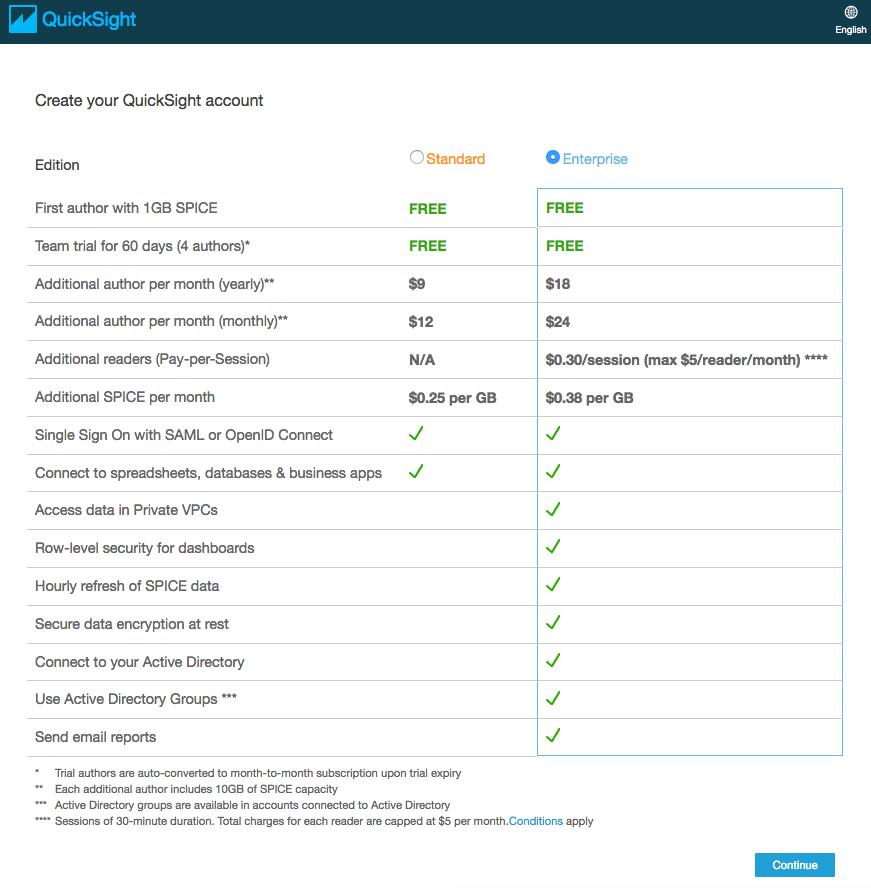
2) Select either edition – the Enterprise edition provides better integration with enterprise directories and other features, but for today we will only use simple visualisations– and press “Continue”.
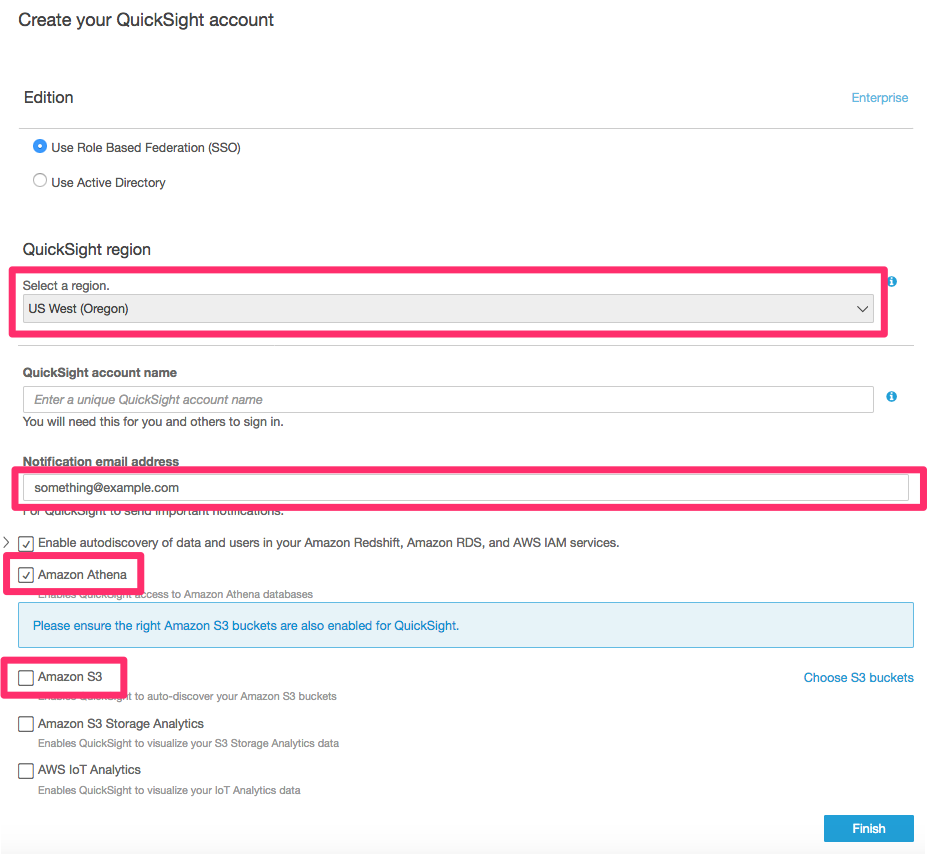
3) Pick basic settings. Most important for us is the region (pick “US West (Oregon)" to colocate QuickSight in the same region as your data) and that we use "Role Based Federation (SSO)" so we can keep using our IAM users in QuickSight and do not have to set up a directory.
QuickSight provides analyses and dashboards that can be shared with other users within your organisation but you can also invite people “from the outside”. To do that you need to provide your QuickSight account with a unique name. Let’s use “MFG305-<yourname>” as the name of your QuickSight account for this workshop (replace “<yourname>” with your actual name).
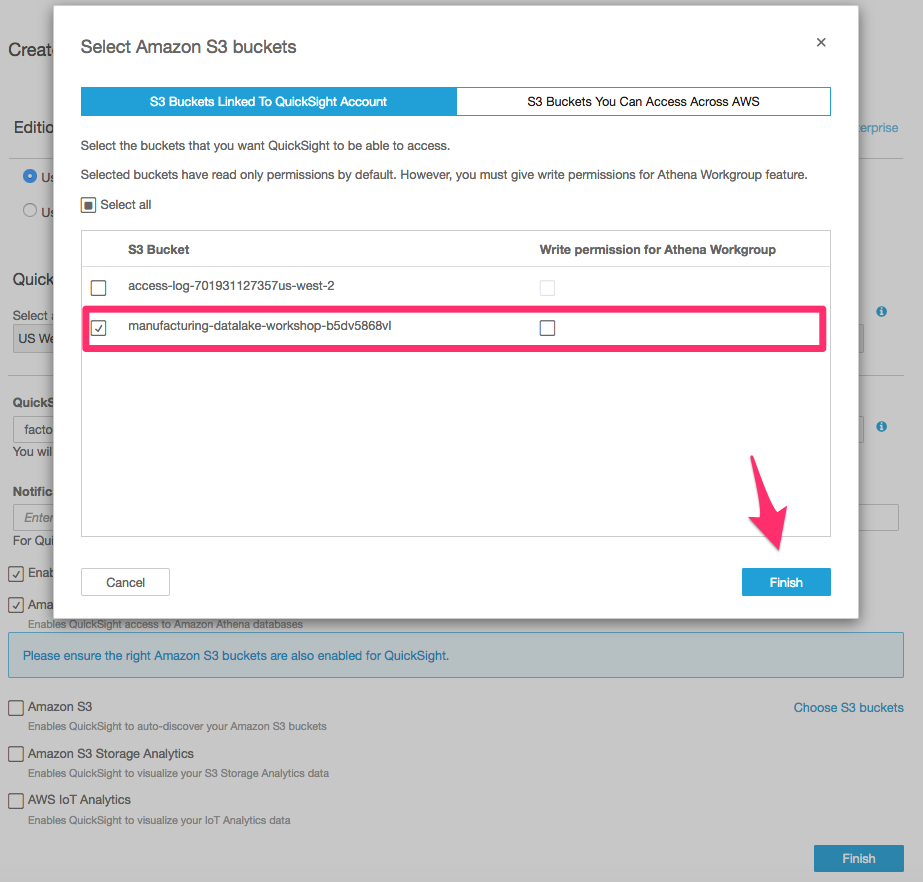
Enter an email address for the occasional notification and then pick the data sources we can use in QuickSight: enable Athena and then click on S3 to select our Amazon S3 bucket.
Press “Finish” when you are done with your settings and you will be greeted by a confirmation page. Press the “Go to Amazon QuickSight” button.
