Basic Data Lake setup
In this next section, we will use AWS Lake Formation to configure settings for your data lake, e.g. where data is stored, define permissions and so on.
Roles & Permissions
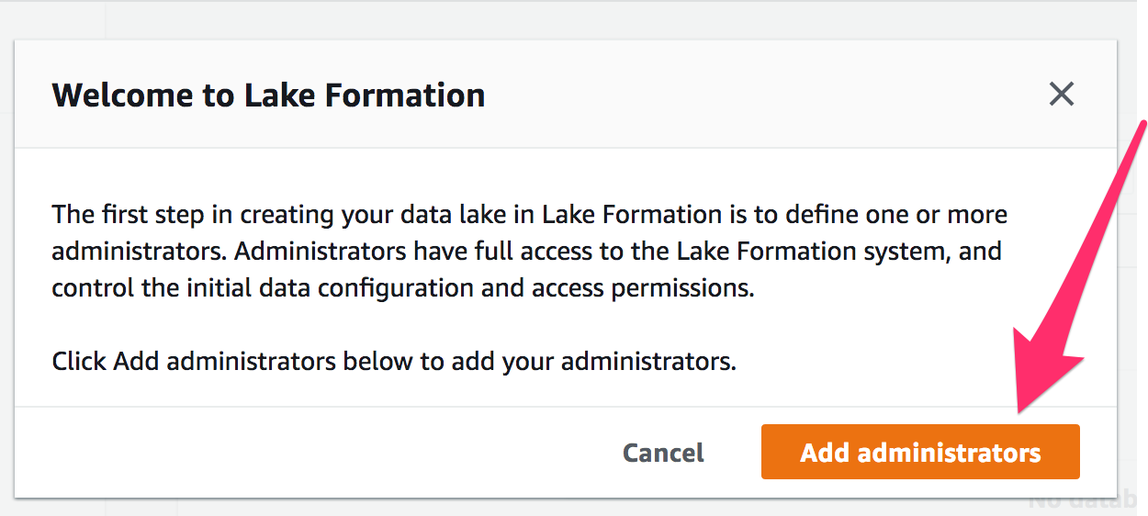
1) Open AWS Lake Formation in the AWS Management Console. If this is the first time you are using AWS Lake Formation, you will be asked to define who (which users or roles) will be allowed to perform administrative tasks on your data lake. Press “Add Administrators”.
If you accidentally cancelled this dialogue without selecting a role, click on “Admins and database creators” under “Permissions”; press the “Grant” button in the section “Data lake administrators”.
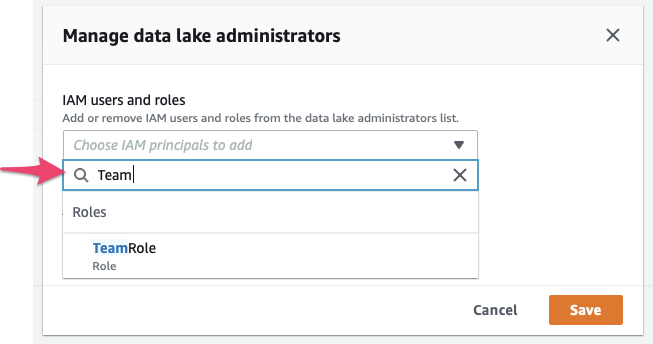
2) Select the role you will be working with in the AWS Management Console.
- When you are using an account that was set up using Event Engine, such as a workshop at re:invent, a “Team Role” has been provisioned for you. That is the role you are probably using right now. In the “IAM users and roles” window, type “Team”, which should bring up the “TeamRole”, like in the screenshot below. Select this role and hit “Save”.
- If you are using an AWS account that you have provisioned yourself, use the “Admin” role or another role that allows you to work with IAM and grant IAM permissions.
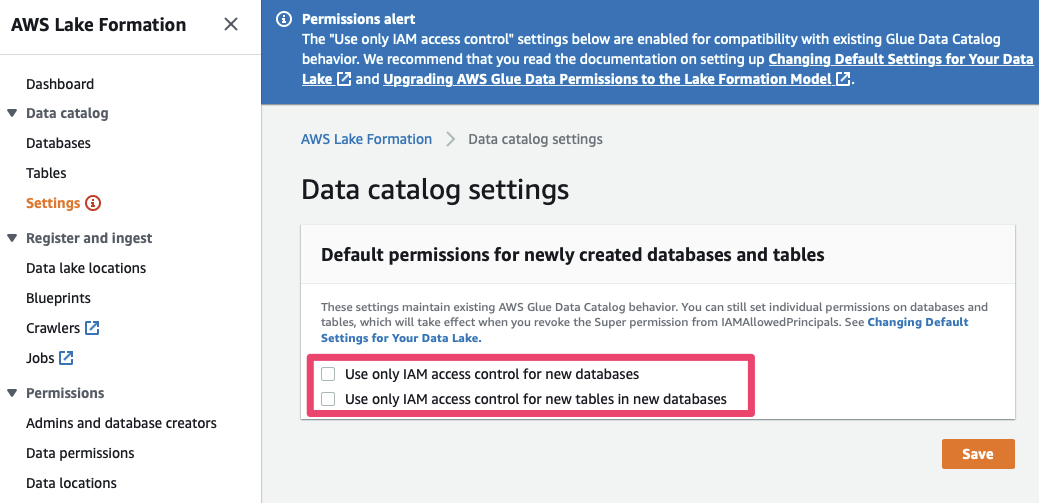
3) Disable default IAM permissions: Lake Formation supports a fine-grained permission model that is managed by the service itself, rather than relying on IAM to manage fine-grained permissions to all resources. By default, however, Lake Formation grants default permissions to IAM users / roles to maintain compatibility with existing data catalogs in AWS Glue. This helps to avoid impacting customers who have been using Glue’s Data Catalog – but since we are using new accounts we can safely disable these permissions.
To do so, access “Data catalog” / “Settings”, un-tick the two checkboxes shown below and press “Save”:
We can now assign fine-grained permissions on the data managed by Lake Formation. In the next step, we will tell Lake Formation where on Amazon S3 its data is stored and make sure that the service has access to this data.
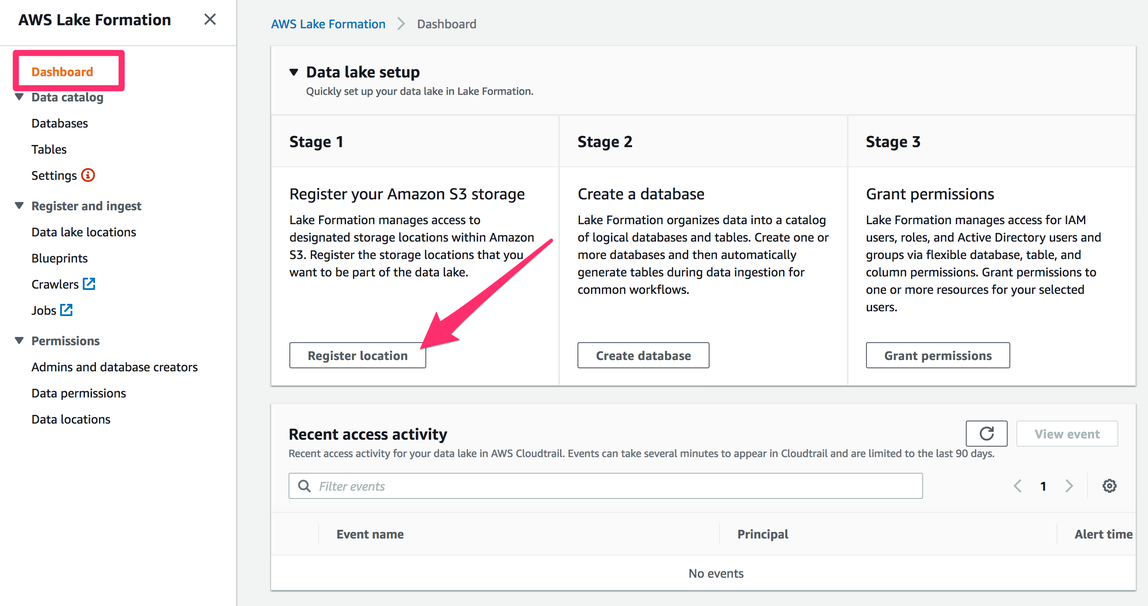
4) Next, we add storage locations on Amazon S3 that will make part of our data lake. To do so, select “Register location” on the AWS Lake Formation console’s Dashboard, or navigate to “Data lake locations” under the “Register and Ingest” header.
In the context of this workshop we have the entire S3 bucket to ourselves and do not need to specify a more precise prefix.
Your account already contains an S3 bucket that has been pre-created for you – use the “Browse” button to select the bucket name starting with “manufacturing-datalake-workshop-”.
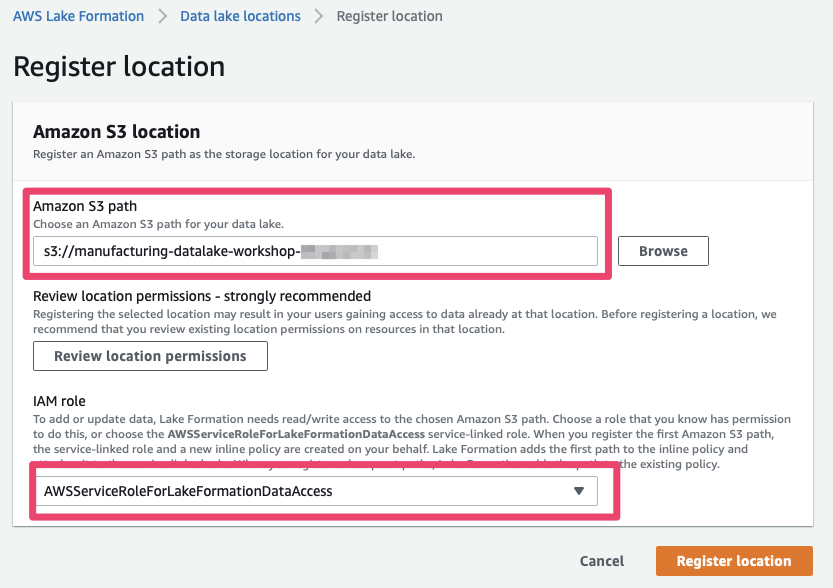
- Next, you need to let IAM know that the AWS Lake Formation Service is allowed to access this Amazon S3 path. To do so, select the aptly named “
AWSServiceRoleForLakeFormationDataAccess” and finally, press “Register location”.
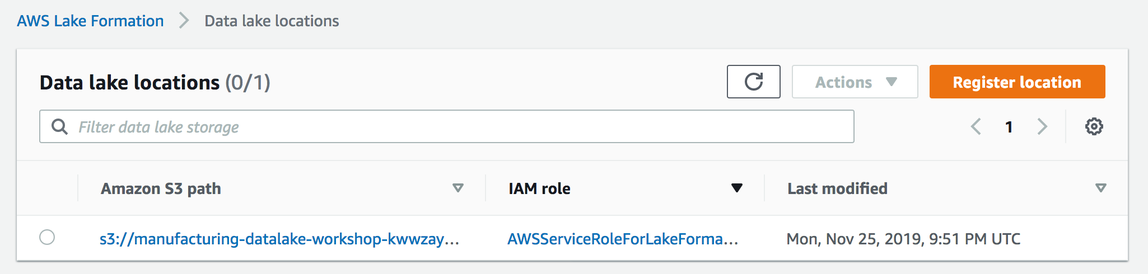
If everything worked correctly you should now see the newly registered location in the list:
Organising Data
In AWS Lake Formation, data is organised in “Databases”, which are comprised of “Tables”. Both kinds of constructs are associated with metadata (e.g. schema information describing the fields that a table consists of) as well as permissions, allowing you to define fine-grained access levels for individual tables. All information on databases and tables is stored in the “Data catalog”.
For this workshop, we will only create one database called “productiondata”.
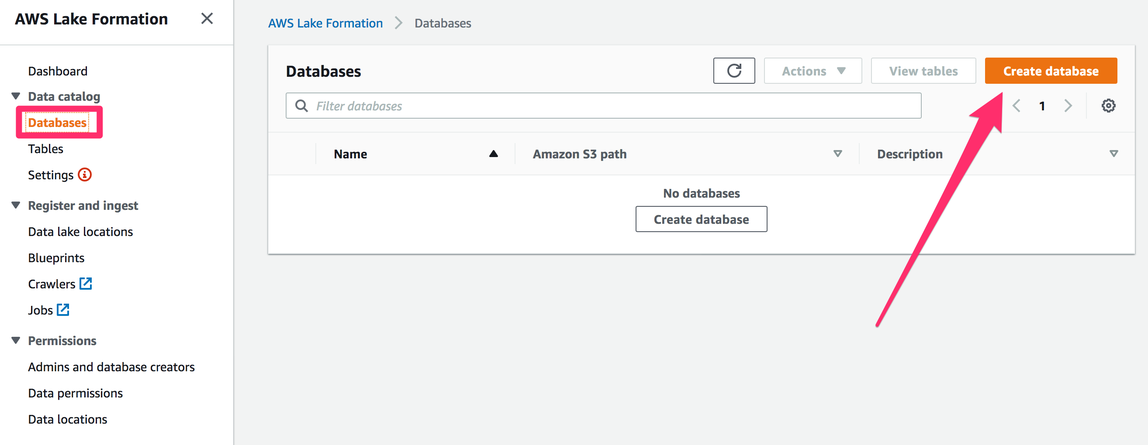
1) In the AWS Lake Formation console, navigate to “Databases” (found under “Data catalog”). If you have not used Lake Formation before, the list of databases will be empty. Press the “Create database” button now.
2) Choose a name for your database –for this workshop, let’s call it “productiondata”– and associate it with a location “within” our data lake location. Click on Browse to select the correct bucket and append /databases as a location. Confirm that the checkbox
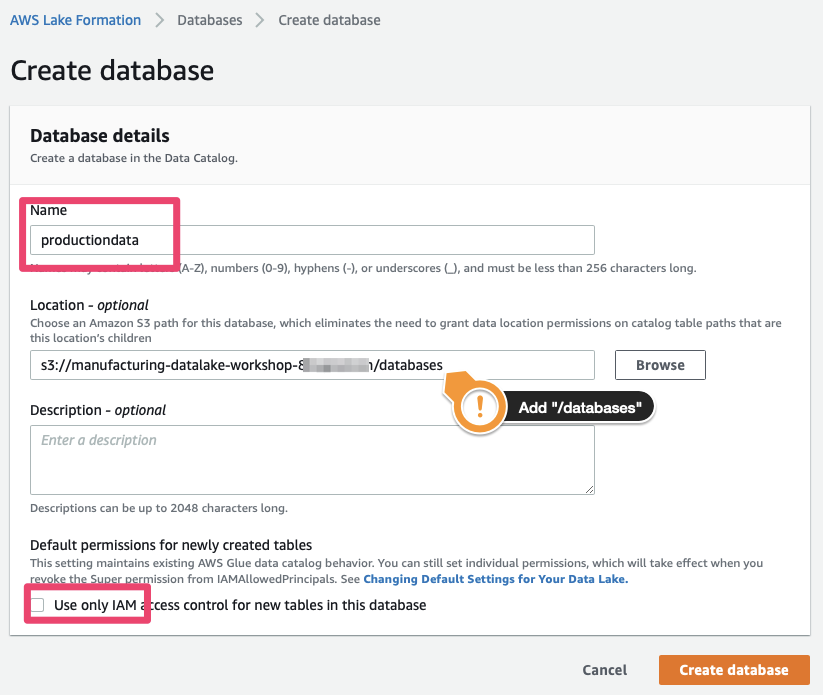
.e. a matching entry has been added to the Data Catalog. Note that our database does not contain any tables (verify by selecting the table and pressing “View Tables”, which should bring up an empty list) or hold any data.
A n
Identifying Schemas and Creating Tables
We’re using the delivery stream we created using Amazon Kinesis Firehose to deposit data in a known location within our S3 bucket – now we need to think about ingesting this data into our data lake. We will use a Glue Crawler to help identify schema information based on the data we have and make sure that it is reflected in our Data Catalog. A crawler connects to a data store, progresses through a prioritised list of classifiers to determine the schema for your data, and then creates metadata tables in your data catalog. The crawler then also associates the ‘data’, i.e. files stored on S3, with the “Table” in the data catalog.
1) Using the Lake Formation console, select “Crawlers” under “Register and Ingest“. This will take you to the AWS Glue Management console, as AWS Lake Formation relies on AWS Glue for data discovery, ETL and other tasks.
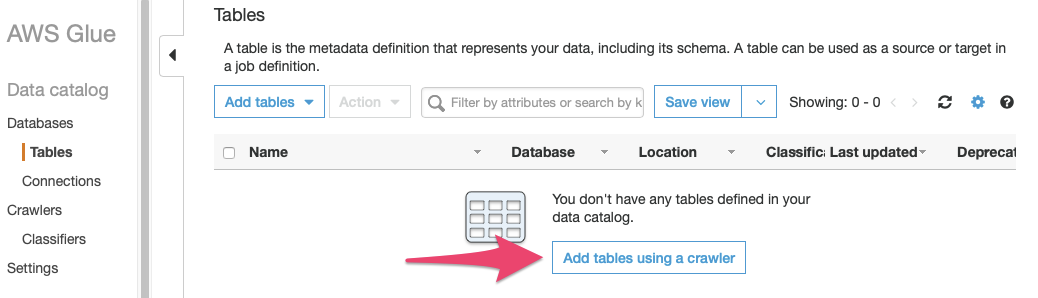
If you are using an account provisioned by Event Engine, which has never used AWS Glue before, you will see the default “first run experience” – simply press the “Get started” button, which will take you to the (still empty) list of Tables. On this list, press the button labelled “Add tables using a crawler”.
If you are using your own account, or if you have accessed the management console for AWS Glue before, navigating to “Crawlers” in the “Register and Ingest” section of the Lake Formation management console will take you directly to the list of crawlers. Press the button labelled “Add crawler”.

Either way, pressing “Add tables using a crawler” or the “Add crawler” button will bring up the “Add crawler dialog”.
2) Give your crawler a name: let’s use “factoryevents-data-crawl”. Ignore the other settings for now and press “Next”.
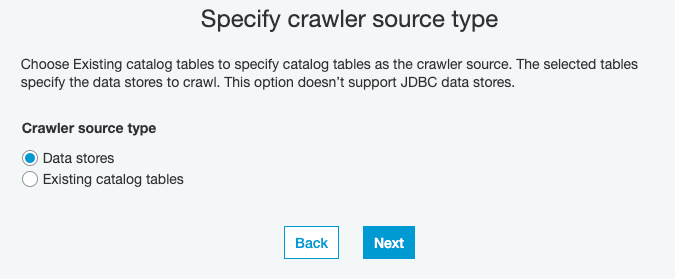
3) Tell the new crawler which kind of source to expect: here, we do not have any existing tables in our data catalog, so we specify “Data stores” , then click “Next”:
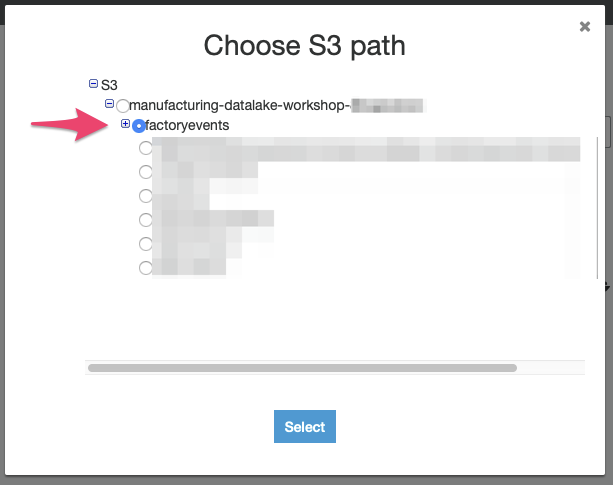
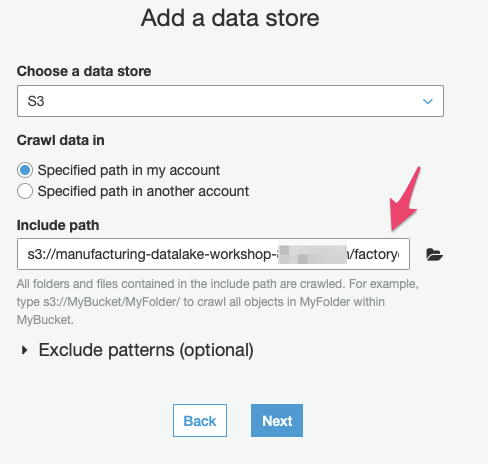
4) In this step, we point the crawler at the S3 path where our Kinesis Firehose delivery stream deposits our raw production data. Make sure that “S3” is selected as the data store and use the “folder” icon next to the “Include path” textbox to select the S3 bucket for this workshop and the “factoryevents” prefix where the delivery stream added the files.
Press “Next”. As this is the only data source we have, select “No” when asked whether you would like to “Add another data store”, then proceed by pushing the “Next” button.
5) AWS Glue will run this crawler on your behalf but you must provide it with the necessary permission to a) access the data store (= the files on Amazon S3) and b) add metadata about the new table to the Data Catalog on your behalf. To do so, we will create a new IAM role that AWS Glue will use to perform these operations:
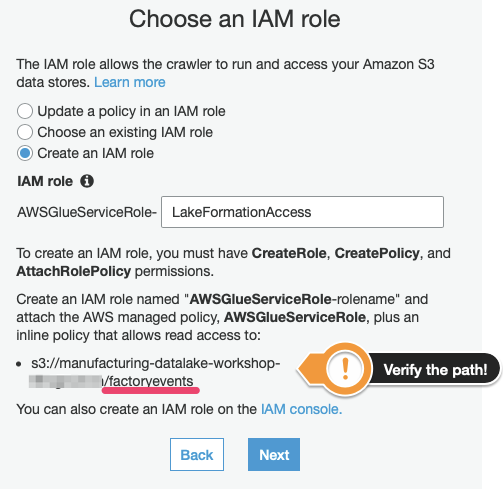
Before you press “Next”, make sure that the S3 path that you grant access to is correct – it should end in “/factoryevents”, as this is where we are delivering our factory data to.
(The name of this IAM role does not matter but pick one that you will recognise later on as we will have to authorise this role to perform other actions using the Lake Formation API.)
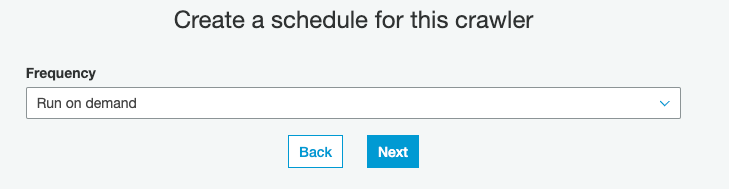
6) Crawlers, like other Glue Jobs, can be configured to run at certain intervals. For the purpose of this workshop, we will run the crawler manually, so please pick “Run on demand”, then hit “Next”:
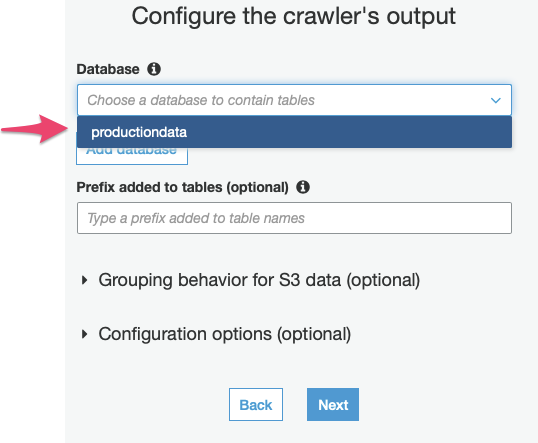
7) The Crawler’s Output consists of metadata added to our data catalog. We need to tell it which database to add the tables to (and ignore the other options for now), then continue to the next, and final stage:
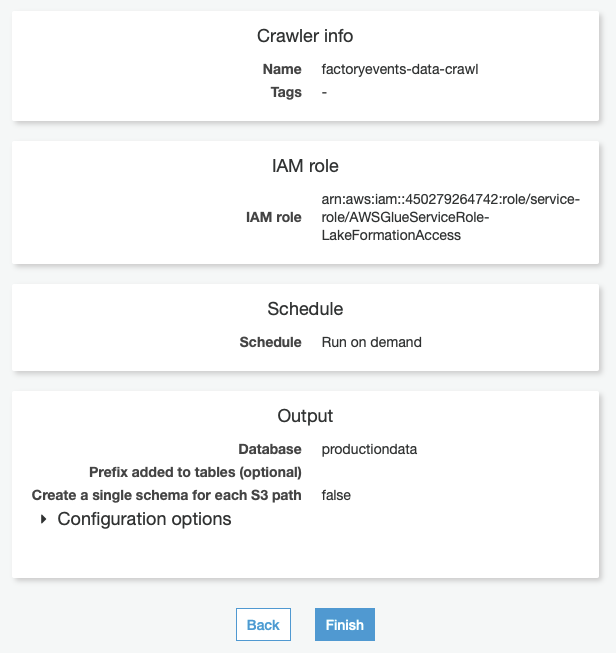
8) Verify that all settings are correct – your review step should look similar to the image below. If you’re OK, press “Finish” to create the Crawler, or press the “Back” button to correct your inputs on the previous steps.
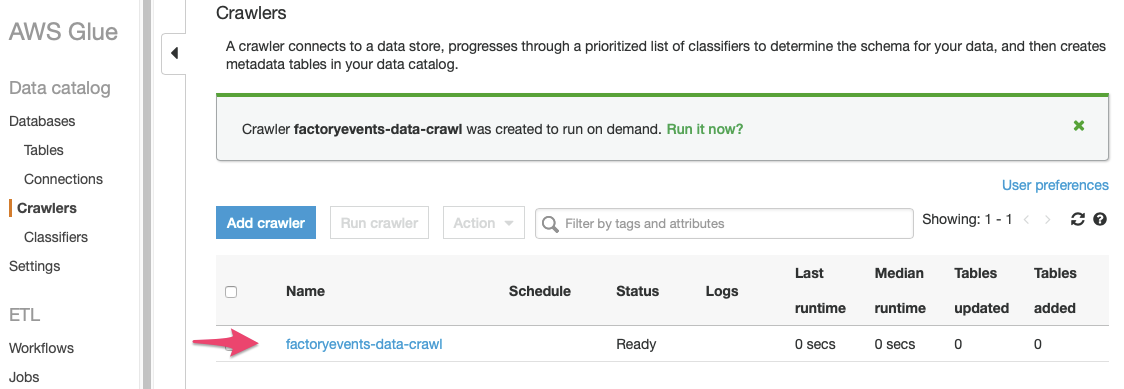
9) You are now back to the list of all crawlers and should see the new “factoryevents-data-crawl” crawler we just defined in the list. Do not start the crawler yet since we first need to adjust the permissions in Lake Formation – otherwise this crawler will not be able to do its job, since we have not granted it access to our Data catalog yet!
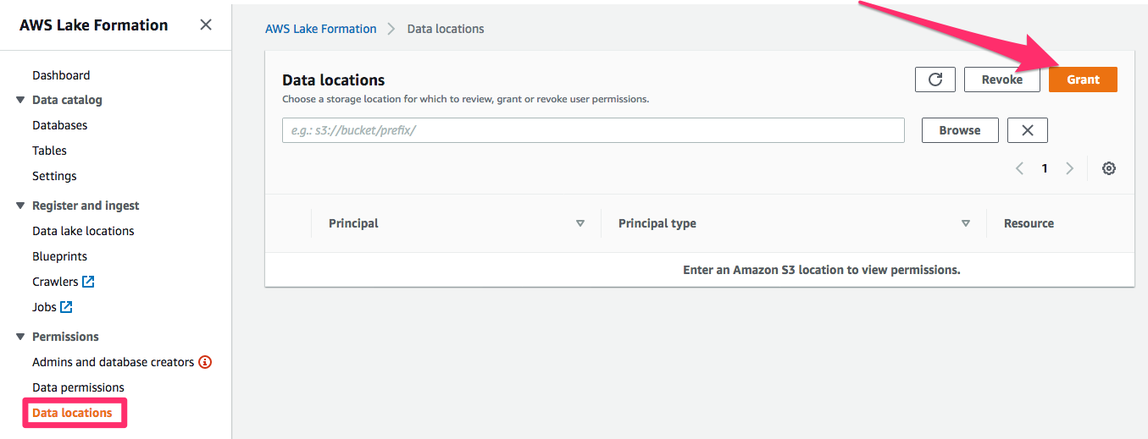
To allow the crawler to do its job, go back to the Lake Formation console. Navigate to “Data locations” (under “Permissions”) and click on “Grant“:
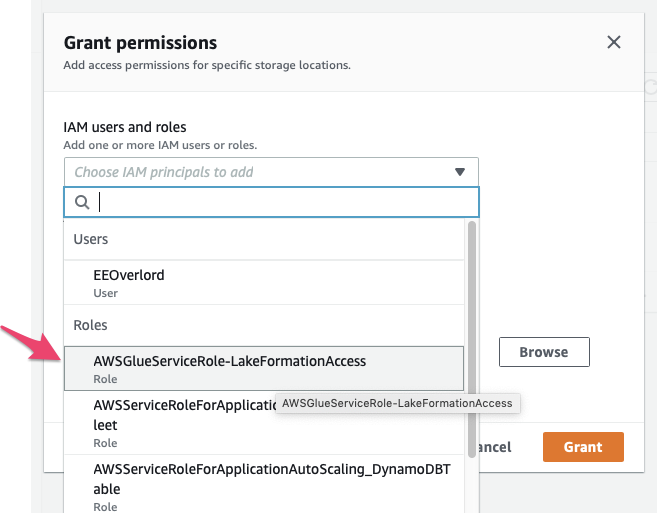
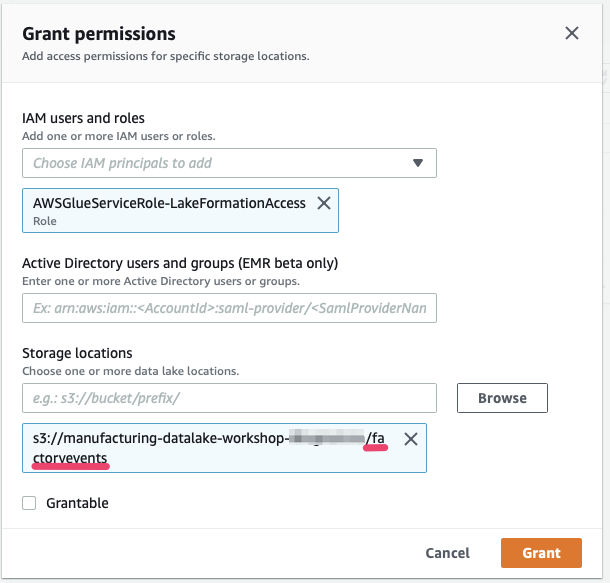
Remember the IAM role we created for AWS Glue to use when running this crawler on our behalf? Select this role (called “AWSGlueServiceRole-LakeFormationAccess” if you followed the previous steps), then select the S3 prefix we have told our Crawler to scan for data:
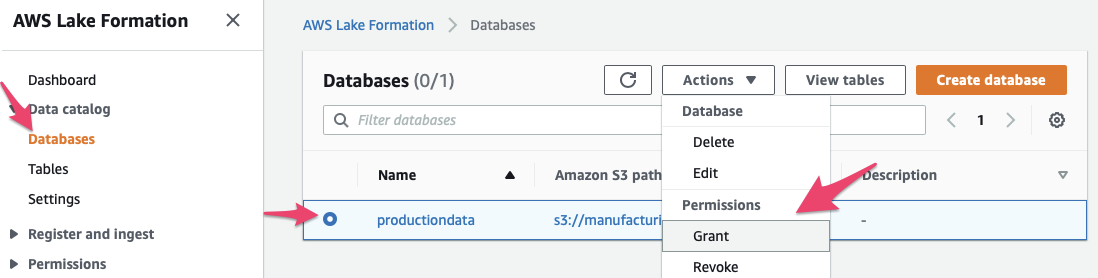
We then need to grant access to write to the database. In Lake Formation go to “Databases”, select the “production_data” database and click on “Actions”, then on “Grant”
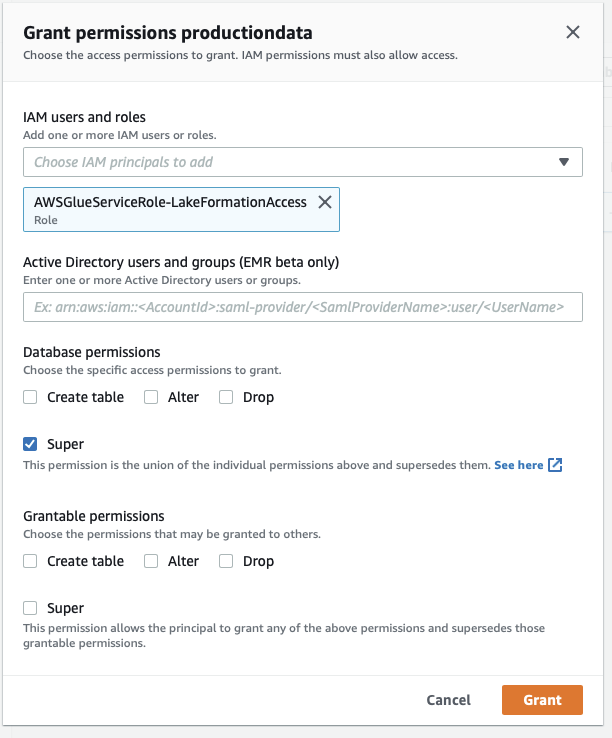
Then grant “Super” permissions to the IAM role that the glue crawler is using (named “AWSGlueServiceRole-LakeFormationAccess” if you followed along) and click “Grant”
Ok, we’re ready to roll! Our Glue crawler now has the necessary permissions to
a) load data from Amazon S3 at the location we specified (“/factoryevents”)
b) add new tables to the Lake Formation Data Catalog.
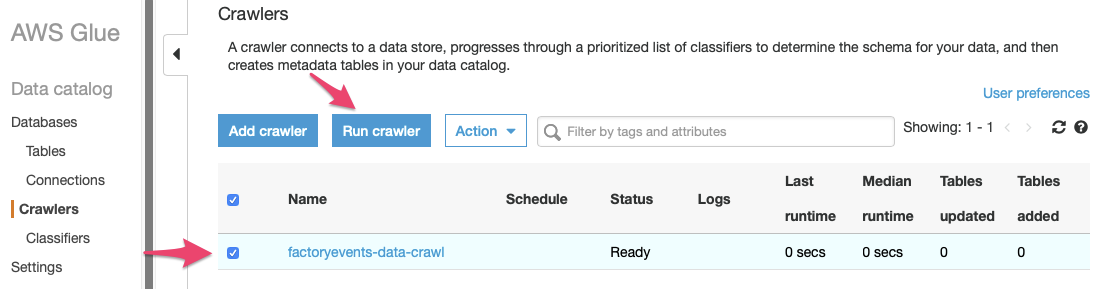
Now we can go back to the Glue Management Console and start the crawler: select the crawler from the list and press “Run Crawler”:
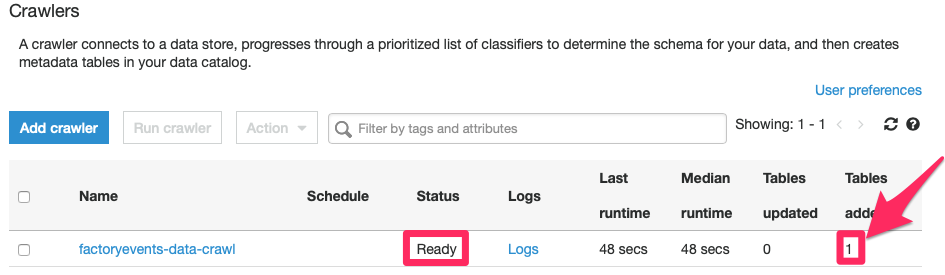
As the crawler is running, the “Status” field and other metrics on the crawler’s line will update. You can watch the crawlers status change from “Ready” to “Starting” etc. – it is done once the crawler is in “Ready” state again. Now is a good time to review its “Logs” (feel free to click on that link, we’ll wait…) to see whether it has run into any problems.
If all went well, you will notice that the “Tables added” column in the list of crawlers has been increased to 1:
What happened? Let’s go back to the Lake Formation console and review the list of tables – we can see that a new table called “factoryevents” has been added.
Defining Table-level Permissions
10) The new table is ready – but right now, we (= our IAM role “TeamRole”) are not allowed to modify or query this table, as Lake Formation enforces a strict permissions model. So before we continue, we need to grant ourselves the appropriate permissions (which we can do since we are the Lake Formation Admins):
- Navigate to “Permissions” > “Data permissions” in the Lake Formation console
- Press the “Grant” button to open the dialog where you can enter permissions:
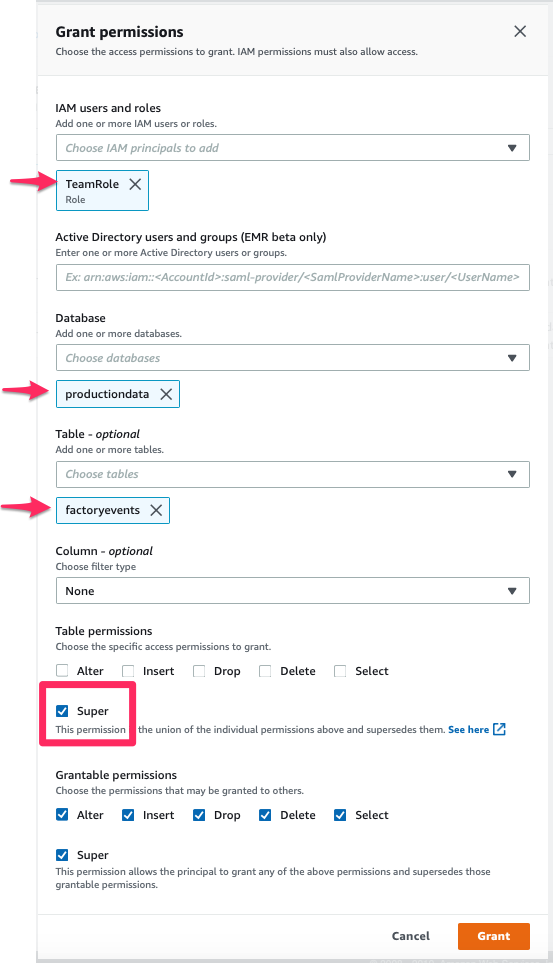
Now we are (almost) done with the basic permission setup. While this level of detail in authentication controls might be “too much” for a simple use case like that, please be aware that only a part of these steps will have to be repeated for each new data source / database / table we add to our manufacturing data lake in the future.
Querying Data
Now we are done with our basic setup – we have a database, a table (“factoryevents”) that is mapped to a series of files with event information we collected from our PLCs; and we have seen how we can control different aspects of permissions management, and thus, control access to our data.
Let’s have a look at our data; we start in the Lake Formation Console on the list of tables:
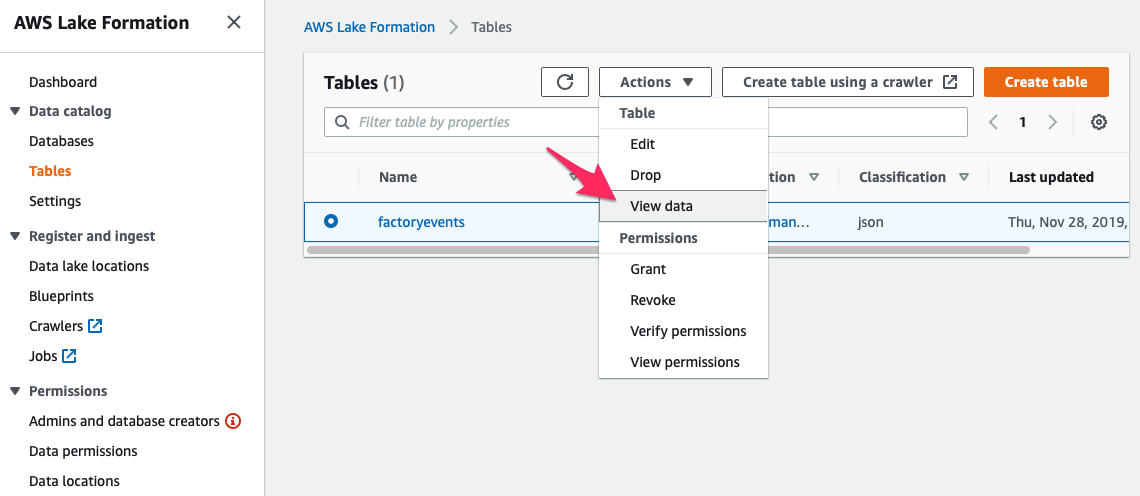
Selecting our new table and then picking “View Data” from the “Actions” menu opens the Amazon Athena console, providing you with an interactive query editor to run SQL queries on your data. (Click the “Get Started” button to skip the first run experience and get to work.)
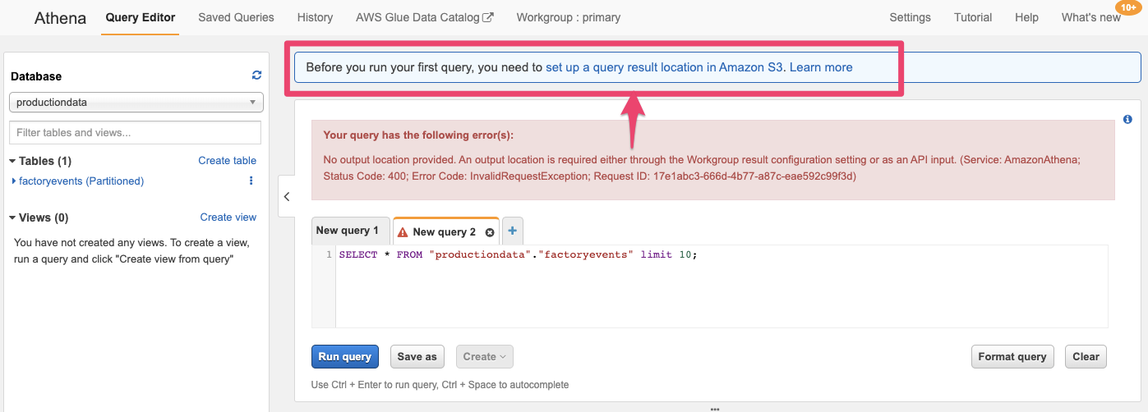
If you have never used Athena in the browser in this account (which is probably the case if you use Event Engine) you need to first configure the Amazon S3 location where Athena can store its query results. Before you add this setting you will not be able to run any queries from the browser! Click the “set up a query result location” in the blue box or use the “Settings” button/tab, above.
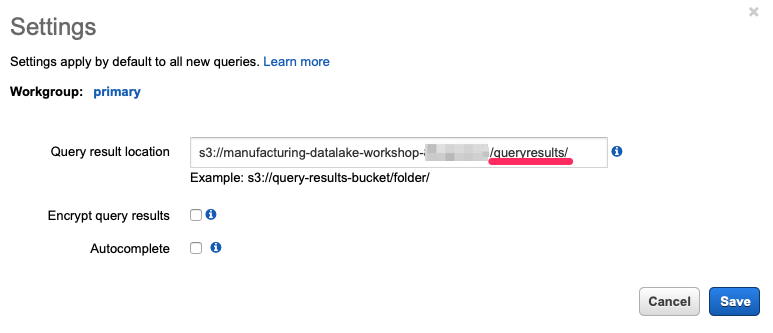
Then add the location of our S3 bucket and append /queryresults/ (pay attention to the trailing slash “/” – omitting that will result in an error message!) where Athena will store the query results for the queries you execute from the browser. Click “Save” and then you can run the query.
That is the only bit of setup we need to do in Athena, so now let’s try to get a better look at our data. In the query editor, try some
- How many events do we have?
SELECT count(*) from productiondata.factoryevents; - How many products have been produced?
SELECT COUNT(DISTINCT productid)FROM productiondata.factoryevents - What was the result of our quality check? How many ‘bad’ products were created due to issues in our factory?
SELECT count_if(quality='waste') AS waste,count_if(quality='a') AS a,
count_if(quality='b') AS bFROM "productiondata"."factoryevents"WHERE quality is not null;
[…]
In the next steps, we will visualize our data, which sometimes makes it easier to gain insights from the data.
